Thursday, 11 May 2017

Salt and chilli chicken recipe


 What a fantastic way to get my blog started again.  I haven't posted for such a long time And I'm quite excited to post about Salt  and chilli chicken.

 I'm sure I've spoken about how fussy my boy is at eating but this is one of the few dishes that he absolutely loves.  I serve it with egg fried rice and it is gone within minutes.

 This is such a lot better than any of those takeaway dinners.  This is such a lot healthier,  i'm not saying that this is slimming by any means though! Lol.  I love to cook this on a Friday or Saturday night,  so that we can all sit together and watch rubbish on telly.  It really does feel like we having a takeaway.

Thursday, 7 May 2015

Nam prig pow recipe. Thai red chilli paste


Nam pla prig, is one of those condiments that you just can't get enough of!! It is also an essential ingredient To many Thai dishes like Tom yum goong.  I always crave fried rice with nam pla prik, because it is such an easy dish to make. You can make it as simple or as complex as you like. You could add your choice of seafood or meat, or any vegetables that you might have at hand. It is also very very nice with fried noodles of you choice. It is nice as a condiment, I also like to use the bright red oil for drizzling over meals for decoration. The list just goes on! Just use your imagination and go wild with the possibility 's.

You can also play around with the flavours, until you get the flavour or spiciness to you liking. But remember, hot, salty, sweet and sour and you can't go far wrong.

Ingredients

1/4 cup of small dried shrimp, lightly fried for a few minutes, or until crispy.
About 1 1/2 bulbs of peeled and sliced garlic,
5-8 dried red chillies lightly fried for a few minutes until well toasted.
1 1/2 tbs jaggery or palm sugar
4-5 shallots or enough to be roughly 1/2 cup
1 tsp shrimp paste
2 tsp tamarind paste soaked in 1/2 cup of water
1/2 cup of sunflower oil
1 tsp salt

Directions

1. Measure out and prep all of the ingredients so the you can be efficient. Heat the oil on a low heat.
2. Fry the shimo until crispy and set aside.
3. To the same oil, add the dried red chillies. It should be a matter of seconds before they darken. Drain and set aside.
4. Then add the sliced garlic and fry until golden. Set aside.
5. Fry the shallots and fry for about five minutes or until they have no water in and are brownish golden. Set aside.
6. Now the traditional way to processed, would be to grind everything in a pestle and mortar. But to save time, I like to grind everything up in an electic blender or coffee grinder and the empty the paste into a pestle and mortar and add the salt, Palm sugar and the shrimp paste. Pound everything well until it is a paste.
7. Return the paste back to the oil and mix the tamarind paste in. Let everything bubble on a slow and low heat. Keep stiring and checking the consistency. It should have a beautiful flow of the spoon like lava. If it doesn't. Then just add more water. Simmer for 3-5 minutes or until done.  
 Transfer into suitable container. This paste should be good for a month and you can also freeze this paste.

Fantastic with fried rice. Nam prig pow fried rice recipe here

Enjoy and let me know what you think. 😍

Wednesday, 29 April 2015

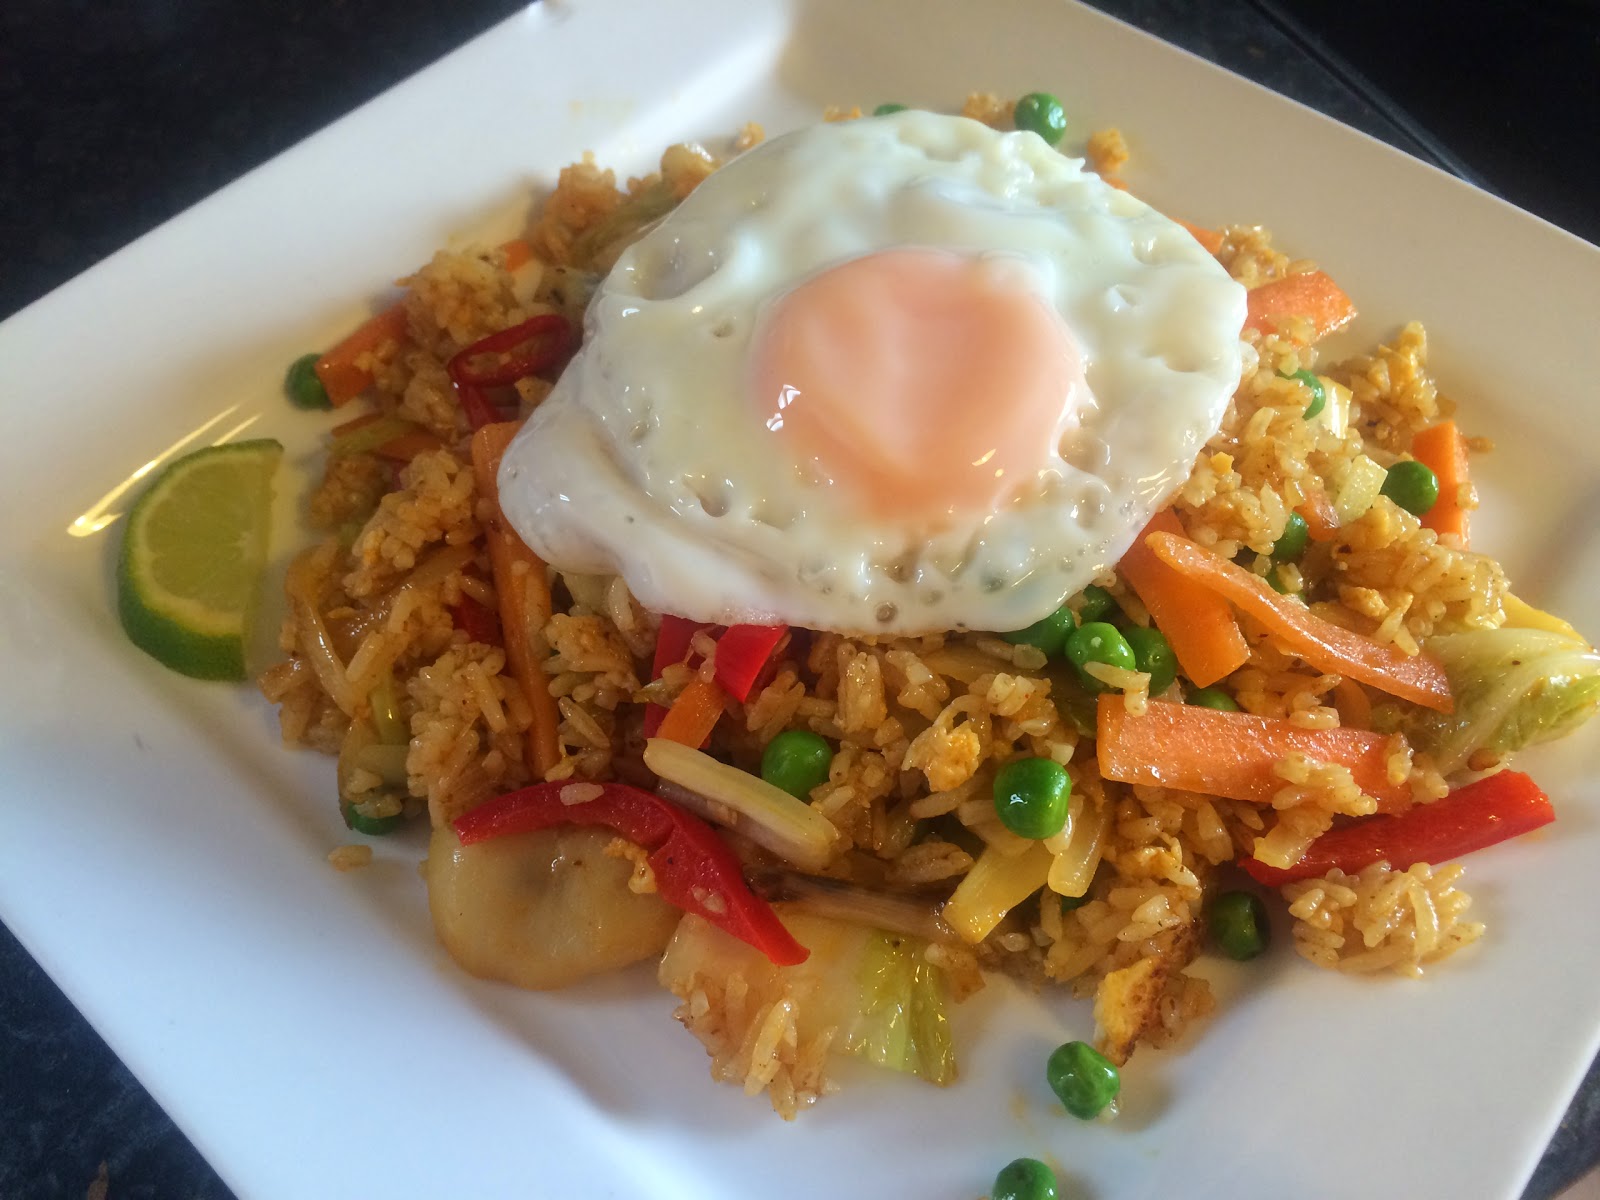
Thai Nam prig pow and vegetable fried rice recipe


I actually can't believe that this is my first Thai recipe on this blog, when it is one my all time favourite cuisines! My husband and I have been to Thailand many times and we have completely fallen in love with the country, cuisine, culture and most of all, the people!

I actually think that this is a very suitable dish to have as my first Thai recipe on blog, simply because It was one of the first dishes that I had on my very first visit to the land of the golden smiles.

What I love about this dish is that this recipe calls for left over rice. So what I always do, is cook double the amount of rice the day before. It then makes for a really good lunch time, or evening meal.
You don't even have to add the veggies if you don't want to, or you have little time to spare.

One thing I would recommend you try although it is definitely not essential, is to make your own nam prig pow paste. The one that you buy from the shop is truly delicious, it is just good to be able to make it according to your own tastes and also you know that there isn't any rubbish going into it. It isn't hard to do, just make sure to do it in advance. I will post my recipe next. Oh I'm sorry, im forgetting to say what nam prig pow is!!!! It is a massively amazing versatile Thai  paste, containing caramelised shallots, garlic, chillies and other ingredients. I don't live very close to an Asian supermarket, so I like to make my own. It will last for about 3 months in an airtight container in the fridge.
Here is the link for the paste recipe below. 😄


Here is the recipe for nam prig pow fried rice!

2-3 cups of left over rice. Jasmine or basmati is preferable.
1/2 a large white onion,
3 spring onions,
1 carrot
3 or 4 large leaves of Napa cabbage or Chinese leaf
1/2 cup cooked green peas
1/2 large red pepper,
1 large red chilli
3 cloves garlic
Bamboo shoots and water chestnuts just to taste
1 tbs fish sauce,
3 tsp nam prig pow chilli paste.
Lime wedge for seasoning to taste
2-3 eggs. One for frying and popping on the top.

Directions
Prepare everything befor cooking.

1. Julienne the all of the washed vegetables to a uniform size. Just roughly chop the garlic.


2. Heat a tbs of oil into a wok and wait until it reaches smoking point.
3. Add the onions and fry for about a minute before adding the chilli and the garlic.


4. Add the carrots and fry for about a minute, then quickly add the peppers, spring onions, bamboo shoots and water chestnuts.add the Chinese leaf at the end and only stir fry for a minute or so.Stir fry until done. Set aside.


5.to the same wok as you were just using, add another 1/2 tbs oil and wait until it reaches smoking point.
6. Add the left over rice and stir fry for a minute or so, but make sure that you break up all of the lumps.
7. Push the rice to one side and break an egg into the pan. Scramble the egg until it is in fairly small pieces.


8. Mix the rice and the egg together and then add the fish sauce and the nam prig pow. Mix everything together really well.

9. Add the vegetables and stir fry everything together for a few minutes. Taste for balance of flavours


10. Heat up another frying pan for the egg. Quickly fry the egg, ensuring that you leave the yolk runny.
 11. Serve the hot rice into bowls or plates and serve the fried egg on top with the wedge of lime.

ENJOY!!!!!


Sunday, 11 January 2015

Vaghereli rotli (left over chapati in yoghurt gravy)


This is one of warming, comforting dishes that is very easy, healthy and quick to make. Extremely satisfying dish. This dish is always the sort of thing that i crave every once in a while and also when I am on my own and wanting to get snuggled up on the sofa, all safe and cosy. :D

When I make chapatis, sometime I make a few too many and then freeze the leftovers for this dish
alone because i love it so so much and cuts down a. lot of cooking time drastically.

It is cooked in a  sour yoghurt gravy, so it is a good source of calcium too! And great for using yoghurt that is close to its sell by date. You would never believe how tasty this dish is. I just think its amazing when you think that it is all made with leftovers! Simply delicious!!!

Ingredients:-

8 or so left over chapatis,
1 cup of sour yoghurt,
2 1/2 - 3 cups of water,
1 1/2 tbs oil,
1/2 tsp mustard seeds,
a pinch of hing or asafoetida powder,
1/4 tsp methi or fenugreek seeds,
1/2 tsp cumin seeds,
1 tsp each garlic and ginger pastes,
a few curry leaves
1/2 tsp dhana- jeera powder or coriander-cumin powder
1 tsp of sugar or to taste,
salt to taste,
fresh coriander to garnish.

Directions:-

1. Tear the chapatis and keep to one side.
2. Heat up the oil on a medium heat and once it is hot enough, add the mustard seeds.
3. When they pop add the cumin seeds, fenugreek seeds, curry leaves, asafoetida, and fry for a few seconds before adding the garlic and the ginger pastes and the turmeric. Fry on a low heat for a few minutes until the turn translucent and the raw smell goes.
4. Add some salt to taste, sugar and the water, bring back to the boil and simmer for about 1 or 2 minutes.
5. Add the yoghurt and the torn up chapattis, test for seasoning, if its ok then sprinkle with coriander and serve steaming hot! Enjoy and feel free to comment and let me know what you think! :D :D

Wednesday, 10 December 2014

Pav Bhaji Recipe


Pav bhaji! This is a typical street food dish, that comes from the streets of Bombay. If you are looking for a healthy dish, you can reduce the amount of butter used, but you will missing the point of this dish entirely! It is supposed to be super rich and super buttery! There has been many occasions that i have made this dish too hot, but that tends to be something that i get carried away with quite often! :)
So a word of warning if you are making this dish for young children, then I would reduce the amount of chilli that you add. BUT! it really is best to have this dish buttery and spicy.

I also like this dish because you can use some normal rolls from the supermarket. Traditionally, you would use pav buns, but unless you want to make our own or you have an Indian grocery store nearby, then just go for plain white rolls.

This recipe is also very versatile. You can really chuck in as many different types, or as few as you would like. It really doesn't affect the overall taste too much, but I like to add as many different kind of veg, just for the nutritional value. The recipe that i'm posting about today is a more complex version, but I will post a simplified version soon.

It is a long list of ingredients but please, don't let this put you off! :D

1 large or 2 medium onions, diced,
2 cups of diced potatoes,
1 orange sweet potato,
1 cup washed broccoli,
1 cup washed cauliflower,
1/2 cup green beans,
1 red pepper,
1 green pepper,
3 nice and juicy tomatoes,
1 cup of finely chopped carrots,
1 partially peeled aubergine. set aside in salted water.
1 1/2 cups frozen peas
1 heaped tsp garlic paste,
1 heaped tsp ginger paste,
1/2 tsp green chilli paste,
1/2 tsp mustard seeds,
1 tsp cumin seeds
1/2 tsp turmeric
1/2 tsp hing or asafoetida,
1/2 tsp chilli powder or to taste (optional)
1 tsp pav bhaji masala (essential. store bought or homemade)
1 tsp paprika
salt and 1 tsp sugar. sugar is optional but balances the tomatoes
1 tbs oil
As much butter as you can stomach! I sometimes use up to 150g! Only if it is a treat!
1 tbs lemon juice
fresh green coriander


Directions:-

1. Chop all the vegetables, very finely and steam them all, except the onions, peppers and the peas. Steam until everything is well cooked and soft. Drain and keep aside.
2. Heat a very large pan or stock pot onto a medium heat and add 1tbs of oil.
3. Add the mustard seeds an wait for the to pop and crackle.
4. Add the cumin seeds and asafoetida or hing.
5, Add the diced onions and cook until the are starting to caramelize at the edges.
6. Add the tomatoes and a splash of water if they are not very juicy and cook until it is like a sauce.
7. Add the turmeric, chilli powder, ginger, green chilli and the garlic paste and cook until the raw smell goes. Maybe a minute.
8. Then add the peppers and cook for about a minute.
9. Then add all of the steamed vegetables and the pav bhaji masala. Mash all of this together keeping everything on a low heat at this time. Simmer everything with some salt for about 10 minutes to let the flavours mingle, stirring it occasionally.
10. Add the frozen peas and cook for another 5 minutes, or until the peas are cooked. stir occasionally.
11. Add the butter and the lemon juice and stir until blended through and then give it a taste to check the seasoning .
12. At this point you want to prepare your bread. I like to lightly toast each side under the grill and then lightly butter.

Serve piping hot with lots of coriander and some kachumber salad ( raw onions, cuccumber and tomato.

ENJOY!! :D X


Monday, 8 December 2014

traditional Khichi or khichu recipe ( rice flour dumplings)


I have already posted a recipe for khichi before, but it was a very early recipe of mine and completely improvised. It has always been an all time favourite snack of mine to buy when I go shopping to belgrave road. Another reason why it is a favourite is because it is steamed, so it is a healthy option to the fried snacks. When I have given it to other people, they either love it or hate it, but a word of warning, if you like it, you wont be able to stop eating the stuff. I now make this snack weekly because i find it keeps well in an airtight container for up to 3 days.

Anyway this is a completely different way of cooking khichi to my last recipe. It has been given to me by my friend who used to work in one of the sweet marts that i like to visit. I am very lucky to share this recipe with you. I was so over joyed when I first cook khichi this way. I hope you will be too! Let me know what you think........ :D

Ingredients:-

1 cup of fine rice flour,
1 tsp cumin seeds,
1/4 tsp asafoetida or hing,
a pinch of turmeric,
1 tsp of fresh green chilli paste,
1/2-3/4 tsp fresh ginger paste,
1/2 tsp papad khar,
around 3/4 tsp salt or to taste.
Fresh green coriander and red chilli flakes.

Directions:-

1. Heat  medium sized pan an the cooker and add 2 1/2 cups of water.
2. Into the water add all of the ingredients except for the rice flour.
3. Bring everything to a boil. once it reaches boiling point, add the rice flour and stir with all of your might! It has to be lump free!
4. Kneed the dough with a wooden spoon or or spatula until it becomes all nice and smooth.
5. Get a large steamer pan heated up and ready. I use one of those steal stack steamers that you cook on the stove top.
6. Transfer the dough into a slightly smaller bowl or plate and spread out so that it is fairly thin. Cover it with cling film to stop the drips from getting in.
7. Pop it into the steamer and steam for 15-20 minutes, giving it a quick stir halfway through.
8. This next step is completely optional, but i think it looks really nice and makes it easy to serve, but you could just transfer it into a suitable bowl.
Leave the khichi to cool so that you can handle it. With lightly oiled hands, scoop up the dough and make little patties. using your thumb or the end of a rolling pin make an indentation in the center. Do this until you have used up all of the dough.
9. Sprinkle fresh green coriander and red chilli flakes and a drizzle of oil (optional)

Wednesday, 26 November 2014

Potato and aubergine recipe ( Baingan batata nu shaak )


Oh my goodness!!! It really has been such a long time since I have updated this blog. I have had a very very busy year. As it goes, iv just been really busy having a good time with my busy family and my fantastic friends and my other hobby, painting. I will upload a few pics of my paintings soon, or even set up a new blog on painting! hummmmm.......... lol 

Anyway, If you are familiar with a gujarati thali, then you will be familiar with  baingan batata nu shaak! It is generally an every day recipe, which is quick, easy, cheap and very healthy too!

You can elaborate the recipe to you families taste too. It is nice if you add a few hand fulls of green peas or spring onions in towards the end, or even extra spices like black onion seeds, whole dried red chillies or cloves and cinnamon.

This was also one of the first indian dishes that I learned to cook. Im telling you this because i have an extreme affection for this dish. It brings back so many happy memories, cooking in the kitchen with Manjula "mummyji" As I have said before on other posts, Manjula was not my actual mum, but more like a kind of surrogate mother to me for a few years. So every time I eat this dish it brings flooding back joyful memories for me! :D

Anyway, on with the recipe............


Ingredients:-

1 large aubergine,
4 medium potatoes,
1 large juicy tomato,
1 large dried red chilli,
1/2 tsp mustard seeds,
1/2 tsp cumin seeds,
1/2 tsp black onion seeds,
large pinch of hing or asafoetida,
1 tsp garlic paste,
1 tsp ginger paste,
1/2 tsp green chilli paste or to taste,
1/2 tsp turmeric powder,
1/2 tsp chilli powder or to taste,
1 heaped tsp coriander/cumin powder
1 1/2 tsp sugar
salt to taste,
lemon wedges to garnish and to splash on at the end (optional)

Directions:-

1. Wash, peel and dice the potatoes, and partly peel the aubergine, so that it looks stripy and set them both aside in a bowl of cold salty water. Chop the potatoes and set a large pan, over a medium heat and heat the oil.

2. Once the oil is hot enough, add the mustard seeds.

3. Wait until the mustard seed crackle and pop and then add the cumin seeds, dried red chilli, turmeric and the hing or asafoetida, gently fry for a few seconds and then add the tomatoes, garlic, ginger and chilli pastes. Cook until the tomato is all nice and pulpy and the ginger and garlic no longer smell raw. If your tomatoes are not very juicy, you may add a splash of water.

4.Add all of the dry spices and cook on a low heat for 30 seconds

5.. Drain and rinse the potato and aubergine, and then add the salt and sugar gently add to the pot and give everything a good stir together. Place a tight fitting lid onto the pan and cook until the potatoes are nice and soft.

6. Sprinkle with fresh coriander, and serve as part of a thali, or simply serve with any type of indian bread, but goes especially well with either layered butter paratha or chapati. EASY AND VERY YUMMY!!! give it a try and let me know how you get on.

Any comments welcome!   :D


Thursday, 3 April 2014

Baked Camembert recipe


MMMMM CHEEEEEEEESE!!!!!!!

Don't ever get me wrong, spicy food will always be my favourite food BUT, cheese is just something else! Just when you've gotta have it, you've gotta have it lol!

When there is no-one in the house and no-one to cook for, it is only right that you deserve a little indulgence and if I am ever in that situation, what do I do? I reach for the cheese!!! :-)

So here i share with you my guilty secret. If you want to be generous, it is amazing to share, but i highly recommend that you don't share this one! keep this one to yourself!!! :)

All you need is,

1 boxed camembert cheese. (it has to be in a box that is suitable for the oven)
A few sprigs of rosemary.
A clove or two of garlic, thinly sliced. depends if you are a garlic fan or not.
A drizzle of extra virgin olive oil,
A drizzle of runny honey.

Directions:-

1) Preheat your oven to 180c.
2) Chop the garlic and tear the rosemary into little bits and keep aside.
3) Carefully cut the top rind off the camembert, being extra careful not to waist too much cheese! :)
4) Place your camembert onto a baking tray and pop as much or as little of the garlic and the rosemary as you like. I love it smothered! ;)
5) Then drizzle some olive oil over the top, then some of the honey (probably about 1 tbs) and then pop into the oven for about 20 minutes.

I loved to serve this with fresh sliced baguette and cranberry sauce or red currant jelly!
I hope that you enjoy this as much as i do!! Please let me know :)

Tuesday, 31 December 2013

neer dosa


YUM YUM YUM YUM YUM!!! One of my fantastic customers had in invited me over for tea one day, after a day in the salon. Masala dosa has always been an all time winner for me, but I just couldn't emagine what she was she was trying to explain to me during that day. She explained that these dosa are REALLY something special! They are soft and lacy, with a delicate flavour, made from rice and a hint of coconut. "I will cook them for you later". Because I have turned down a few offers before I thought to myself that I must try this time. I suppose that I have turned down offers to learn how to cook authentic food before out of shyness and not wanting to put people out, but she insisted and I knew that it would make her happy. Well once I had tried these little folded pieces of joy, I was just hooked instantly!

We had a lovely chat and a catch up while we were waiting for the rice to soak. She dressed me up in her sarees and jewellery and I have never felt like such a princess before! This has been a regular treat for me when I go to visit her, but I wont bore you with that story now lol :-)

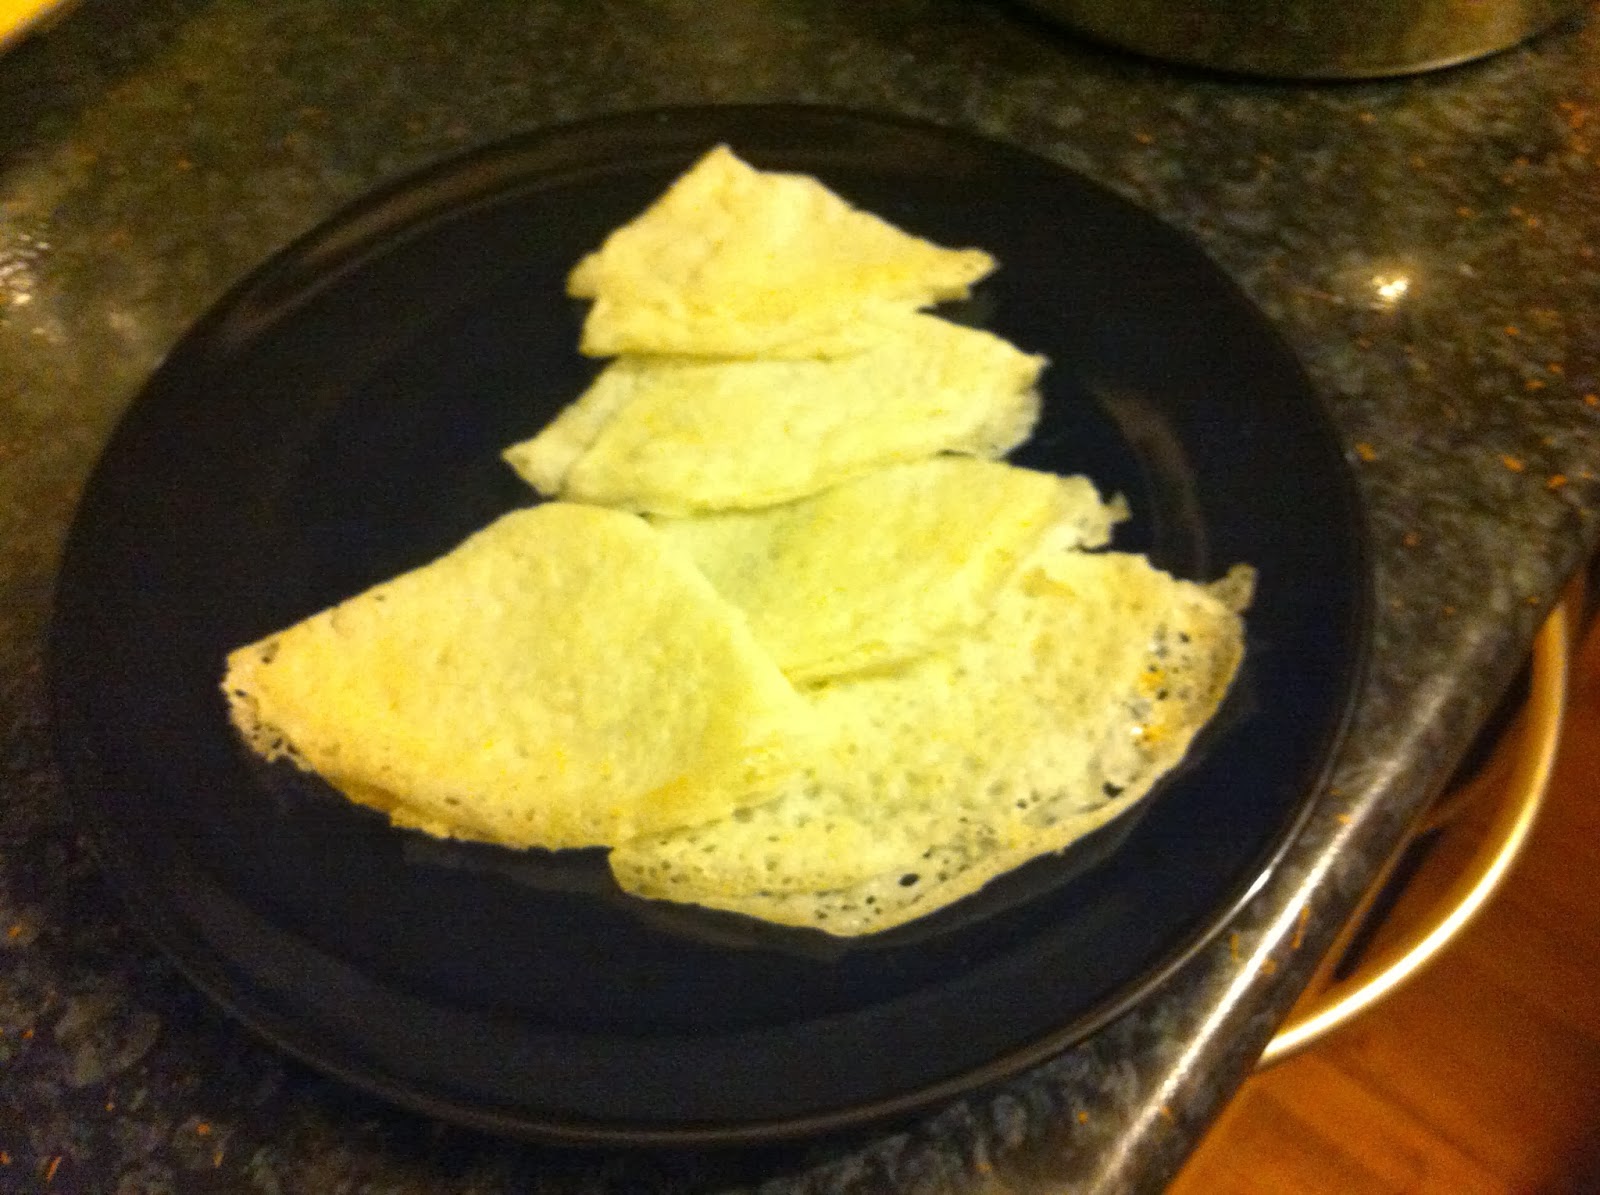
the picture above shows the true colour of the dosa. The picture below is a good close up of the lacy texture, but they look yellow because I took that picture in my kitchen late at night and the light wasn't very good :-S
Ingredients:-

1 cup of sona masuri rice, but any medium grain will do. I have even used basmati and it works fine.
1/4 cup of grated coconut,
in total, approximately 1 1/4 cups of water. more or less may be needed.
3/4 tsp salt or to taste.

Directions:-

1) Wash and soak the rice in enough cold water. My friend on the day soaked the rice for an hour in warm water, but for best results soak in cool water for at least 4 hours, or even over night.

2) Drain the rice and grind with the coconut and some fresh water in a blender until very, very smooth..you will just need to add a little water at a time and also remember to give you blender a rest in between grinding, otherwise it might over heat and go into meltdown! :) To test if you have the batter thin enough and fine enough, check on the back of a spoon. if the batter clings to the spoon, it is too thick. If you batter has grit in it, it hasn't been ground enough. Add the salt. The Picture below shows how the batter doesn't cling to the spoon at all. That is why the dosa is called "neer dosa" It translates into "water dosa"


3) To cook the dosa, you will need a relatively  new non-stick pan, with a tight fitting lid. heat the pan over a medium to low heat. splash a few drops of water, just to check if the pan is hot enough. If it sizzles and evaporates straight the way, then the pan is ready.

4) Pour a few drops of oil onto the pan and grease the pan with some kitchen paper and drop some of the batter onto the frying pan, but you need to kind of tilt the pan to spread a thin even layer.

5) With the back of a teaspoon, drop a few drops of oil in and around the dosa, paying particular attention to the edges. Put the lid on the pan and cook for 1-3 minutes. You don't want the dosa to be burned, but you need the dosa to be cooked.

6) Once the dosa is cooked, using a spatula, loosen the edges and fold into quarters.

Serve this melt in you mouth dish as an an accompaniment to curry with a sauce like sambhar, or enjoy plain with chutney or pickle. In the top picture, I have had it with chole. Enjoy and let me know what you think?    :-)


Sunday, 29 December 2013

King Prawn Cheong Fun with photo tutorial


mmmm cheong fun................ im sure that it is one of your must haves at the dim sum restaurant? Well, it definitely is mine!!

Indian food is my all time favourite, but sometimes you need a break from all of the complex  flavours and just need something nice and plain and simple. Cheong fun is one of those dishes that I crave at times like this! I have had this dish many times in restaurants, but if you have the time, then it is well worth making it yourself.

If you are not familiar with this dish, I could best explain it as a noodle roll with whatever filling is on offer, but my favourite filling is king prawn by far!!!!

It has taken me many attempts to make cheong fun with a smooth and silky texture, but if you follow my recipe, you will be sure to get some success!! Let me know what you think?

I forgot to mention how healthy it is too. It is steamed and the only oil you will need is some oil to grease your trays and a few drops of sesame oil in the sauce for flavour. And not forgetting how nutritious prawns are anyway.


Ingredients:-


165g rice flour,
3 tbs wheat starch,
2 tbs tapioca starch,
200 ml cold water,
300 ml boiling water,
just a touch over 1/2tsp salt
25/35 fresh king prawns or gambas.
1 tsp bicarbonate of soda

sauce ingredients:-

5tbs light soy sauce,
1/4 tsp sesame oil,
2 tbs water,
2 tbs sugar

Directions:-

If you know that you are starting to get a craving for some cheong fun, then I would do this part ahead of time like the day before, or that morning.

1) Prepare a steamer for the rice flour. The rice flour needs to be cooked before hand. this gives the cheong fun a nice silky texture.

2) Sieve the rice flour into a heat proof bowl ( preferably metal ) and cover tightly with cling film as so that the flour keeps completely dry during the steaming process. Steam the flour with a lid, on a medium heat for about 45 minutes.

3) Once the time has gone, remove the flour and let it cool slightly, before you sift the flour again. Once the rice flour is cooked, it should be quite hard.

4) While the rice flour is cooking, de-vein and butterfly the prawns, thoroughly dry them and put them in a container or a non metallic bowl and sprinkle on the soda bicarb. massage in thoroughly. leave to marinate, in the fridge for at least an hour. the longer that you do this, the more tender but crisp the prawns turn out.

5) At this point, boil the kettle for the boiling water and mix all of the other ingredients for the batter thoroughly. Add the cold water slowly ensuring that there are no lumps. Then slowly mix in the boiling water and leave in a warm place for about 1 hour-1,1/2 hours.

6) Set up the largest sauce pan that you have and if you have a steamer then great, but just make sure that you have enough trays that fit into your steamer. my trays don't fit inside my steamer, so this is why I do it this way. First, fill up your large pan or wok even and place it on to boil on a medium to high heat. Place a steamer stand or a metal bowl or something in the middle of the sauce pan. This is to act as an elevation stand or platform for your tray. Grease your trays.

7) Once the water is boiling, place one of the trays onto the platform to get hot, stir the batter well again, because rice flour has a tendency to settle at the bottom. Thoroughly rinse and dry the prawns.

8)Once the tray is hot, ladle a small amount onto it and tilt the tray around as to spread a thin even layer of the batter.

9) Steam for 3 minutes and then remove the lid and place 3 prawns slightly to the side. Steam for another 2 minutes. Leave the tray to cool completely before trying to roll.

10) Repeat the process for the rest of the batter in rotation.

11) Take a spoon or a spatula and loosen the sides of the cheong fun away from the edge of the tray. Very gently roll the noodle sheet over the prawns once, then fold in the edges, then continue to roll.  Place the finished roll to one side on a plate and continue to roll the other rolls.

For the sauce:-

Mix all of the ingredients together ensuring that all of the sugar has dissolved. Taste to test the balance of the sugar salt and sesame oil.


Serve the cheong fun hot with the sauce pored over the top.

Please, let me know what you think? 

Thursday, 17 October 2013

DOSA!!!!!

At last!!!! I very proudly enter this blog. This really is one of my all time favourite recipes. It is also a really good recipe to be premiering the new look on my blog! Like it eh? Well I definitely think that it suits my blog better and I really am starting to feel like I have started to accomplish something, with this blog :-)

I feel so proud of myself for finally perfecting this recipe, as I live in a cold climate, it has been a real challenge for me to get the fermentation right and also the right ratio of ingredients.

There are many, many different types of dosas, fillings, chutneys, the list just goes on and on! I must say that i find masala dosas absolutely irresistible. They are filled with creamy masala potatoes and spices. I also quite like to add a red pepper and fried onions to the mixture.

I have had this dish many times at restaurants, but I will never forget the first time I tried these miracles! It was at a very large buffet restaurant, you like one of those all you can eat places, so I wasn't really expecting this place to be as good as it was. In this restaurant, you kinda get lots of tiny little open kitchens and I suppose this was one of those things that completed the whole experience. I walked up the the tiny street vendor style kitchen and asked for just a small masala dosa to try and the chef was more than obliging. I watched in utter amazement as he slapped some white batter onto the hot griddle and in a circular motion, he made the dosa, slapped on some chutney, smeared it around and then slapped on some potato masala, rolled it up and handed me some chutneys and sambar. VOILA!!! The finished dish was utterly amazing!

So for some time now i have been trying to recreate the dish that he cooked for me. So here we go, THE most popular dish in south india........... DOSA!!!!!!!!!!!!!!!!!!!!!! :-)


In this photo, there is the masala dosa,south indian coriander chutney, garlic chutney, "gunpowder masala" and carrot and chilli pickle. I will write the recipe for the rest of the chutneys very soon. :-)

Lots of planning and time needs to go into the dosa batter, but please dont let this put you off as they are actually really easy to make with the right equipment and the right instruction, so go on..... give it a go and let me know how you get on and what you think. :-) ;-)


The above photo shows what the fermented dosa batter should look like.

Ingredients for the batter, to be soaked:-

2 cups of plain long grain rice,
1/2 cup of parboiled easy cook rice,
2 1/2 tbs channa dal,
1 cup white urad dal,
1 tsp fenugreek seeds,
water- as required. 

To be added after fermentation:-

a pinch of bicarbonate of soda,
1-2 tsp salt- to taste.ly

1) Wash the dals with the fenugreek seed and the rice separately, but just a brief rinse. I have learned that there must be wild yeast already on the dals, which is very important for the fermentation. Leave them to soak separately in bowls of water over night. be sure to use plenty of water to soak, as the will grow in size. I have also found that you really do need to soak the rice and dals for at least 12 hours, but you can even go as long as 24 hours if it is a cold day. sometimes, the longer the better.

2) The next morning, drain the rice and the dals and reserve the water that it has been soaked in.

3) Firstly, blend the dal and the fenugreek seeds as finely as you can, gradually adding the reserved water. This is very important as the water helps with the fermentation. If you use water straight from the tap, your batter may not ferment. You should add enough water for the dals to grind properly and so it is not too hard on your blender. you will need approx 1- 1 1/2 cups of the reserved water for the dals. After blending properly, you batter should be light and fluffy.

4) leave a small amount of the liquidized dal batter in the blender and add the rice. blend this mixture with the same principle of adding just a small amount of water at a time. Again you should be left with a thick, lump free batter with just a few gritty bits in it.

5) In an overly large metal bowl or stock pot, add the batters and mix very well. In most recipes, at this point the ask you to add the salt. Where I live i find it impossible to find non iodized salt, or kosher salt, so I never add the salt until the very end, otherwize your batter will probably not ferment at all.

6) As I live in a cold climate, it can be a real challenge to find a good place in the house to ferment my batters. Some people use the oven with just the light on, but that never seems to work properly for me. It always works best for me if I put the batter into the airing cupboard for me, so I pop the batter in there and leave it until it is fully fermented. around 12/24 hours for where I live. see photo for reference.

7) Once the batter is well fermented, add the salt. You can actually taste the batter at this point for checking the salt levels are to your taste. Pre-heat a heavy based towa or a good and preferably new large frying pan onto a medium heat. Dont ask me why, but for some reason if you have used a pan for chapattis or anything of the sorts, then your dosa will stick and become a mess. So please chose your pan wisely.

8) Once the pan is hot and you can check by splashing a few drops of water onto the pan. If it sizzles straight the way, then the pan is hot enough to use. If you pan is too cold, then you will not be able to spread the dosa around the pan properly.

9) For this next step, you will need something with a flat bottom or something very close to flat. I use one of my metal measuring cups. Just before you need to use the batter, ladle a few spoons into a separate bowl and mix a tiny pinch of the soda and mix thoroughly.

10) So then next, starting from the center, ladle a good dollop of the batter and spread, using a circular movement until you have a thin even circular shape.

11) Wait for a few moments or until it is starting to look as though it is starting to dry out. At this point you need to splash a few drops of oil around the edge of the dosa and a few dotted randomly around. spread the oil a little if you can.

12) You now need to let it cook for a minute or so, or until you start to see brown spots. It should hopefully start to curl up at the edges too, so with the back of a spatula, loosen the dosa off the bottom of the pan and then gently flatten the edges until you have a nice even golden colour on the bottom.

13) At this point, if you are making masala dosa, place some of the potato masala into the center of the dosa and spread it around slightly.

14) With the spatula, curl or fold the dosa and gently slide onto a plate, which already had all of the extras served onto it. The most famous side dishes are sambar, coconut chutney, gunpowder chutney, coriander chutney etc.


ENJOY!!!!! :)
 Any feed back always leaves me eternally grateful. especially if you start to follow :-) 

Friday, 4 October 2013

Chilli Fundamentals "MELTDOWN" sauce


I'm going to blog about something different today, but first of all, I would like to apologise for the length of time it has been since I have updated my blog. I have just been so busy with my little family, enjoying the summer and attending lots of gatherings and festivals.

One of those festivals was held in the town of Melton Mowbray. " The Country Fair is definitely one of the nicest little country fairs that you can go to. There are many different types of stalls from fast food, games, crafts and of course there are many delicious specialist food, jams, pickles, preserves and sauces.

Well, this is what leads me to my new type of blogging. I am still always going to blog about all of my favourite recipes, but there was one particular stall that just blew me away.......literally! www.chillifundamentals.co.uk Have held a stall at a few food festivals now in the town of Melton Mowbray and I would say they definately stood out of the crowd with their amazing array of pickles and sauces. I can guarantee, that once you have taken a look or a taste, you will absolutely come back to buy more.

The sauce that I came away with, really is the most incredible sauce ever!!! It's called "MELTDOWN"  http://www.chillifundamentals.co.uk/store/meltdown-chilli-sauce.html. This sauce is a fantastic combination of onions, carrots and of course the amazing "Ghost chilli" The Ghost chilli really does have an amazing flavour and perfectly balanced acidity.

The sauce is endlessly versatile. We have used it to spice up mexican dishes like chilli con carne, used as a marinade mixed with yogurt for lamb, great for b-b-q's and as a dip with chips! The list goes on................


So go on, please buy some chilli fundamentals and do your taste buds a flavour.... oh I mean favour! :-)

Friday, 22 March 2013

channa masala ( Chole )


Oh chole!!! This has to be one of the most all time favourite curries in our house hold. Whenever I am cooking this, I know that my husband will come home a happy man.

Before I carry on, I must apologise for the lack of updates onto my page, but we have had a hectic time over the last few months. First of all was Christmas and my sons 5th birthday, then I had a painting to commission. Also my son, who believe it or not has a food phobia!!! BUT..... He really has been coming on leaps and bounds just recently and is really trying hard to eat. It breaks my heart when my child doesn't eat, so with him making such good progress, you can imagine how busy I have been with cooking and trying out some new recipes that I think that he will eat. All of this on top of my usual stuff to do has just taken up all of my time, so now I have a few days off to relax and catch up on all of my hobbies.

I thought that this would be a really good recipe to kick start my blog again. I'm afraid that there isn't many photographs yet, but I will upload some more at a later date. The trouble is with the photography side is, I just get too hungry!! lol so I promise that I will start to cook earlier so that I have the chance and also I am sure that the lighting will be improved if I take the photo's earlier in the day too.

In this recipe I have added potatoes, but you don't have to add them if you don't want to. Also in this photo, I have paired it up with neer dosa's, but usually you can serve it with just rice or any type of Indian bread. Enjoy!! :) :) :)

Ingredients:-

1 can chickpea's, (the fat boiled one's taste much better in this.)
1 large potato, cubed and boiled,
2 tbs oil,
1/2 tsp mustard seeds,
a pinch hing ( asafoetida)
1/2 tsp cumin seeds,
1 bay leaf (optional)
4 cloves,
a small piece of cinnamon,
1 small tin of chopped tomatoes, or 1/2 large can,
1-2 tbs fenugreek leaves,
1/4 tsp fennel seeds (optional)
1 large tsp garlic paste,
1 large tsp ginger paste,
1 green chilli chopped ( optional )
1/2 tsp turmeric powder,
1/2 tsp red chilli powder,
2 tsp chole or channa masala,
1-2 tsp sugar,
salt to taste.

Directions:-

1) Drain the chick pea's, give them a good rinse and them microwave them on full power with 2 tbs of water for a few minutes.

2) Heat a large pan over a medium heat and add the oil. Once it is hot enough, add the mustard seeds. Wait for them to pop and then add the cumin seeds, bay leaf, asafoetida, cloves and cinnamon. Stir fry for about 10 seconds.

3) Add the tomato, ginger, garlic and the chilli and cook this down to a thick paste and you can see the oil.

4) Add the fenugreek leaf if you are using and mix well into the paste, cooking it down for another minute or so.

5) Take off the heat and add the powdered spices. Mix well and then return to a low heat and add the drained chick pea's. Saute them in the spices for 2 or 3 minutes.

6) Add sufficient water, bring to the boil and then simmer on a low heat for around 10-20 minutes.

7) Add the salt, sugar and potatoes and mix in gently. Taste to check the seasoning and adjust to your taste. Simmer for another 5-10 minutes to let the flavours develop.

Garnish with fresh coriander and serve with your choice of rice and bread....... ENJOY!!! :) :) :)

Saturday, 2 February 2013

Simple egg fried rice recipe


I thought that I would share a few different recipes that I cook at home on regular basis. Even though Indian food is my first love, I am just simply head over heels for all Asian cuisine. I suppose if I was to have some sort of order, of cause my favourite would be Indian, then Chinese (e.g dim sum,) then a very close third would be Thai food, then again very close would be Japanese food. If I have ever been to a restaurant and really enjoyed the food (practically every time :-) I love to try and re-create the food that I have enjoyed. I suppose it is almost like a quest to cook all of my favourite food. I'm sure that I will never complete my quest because there are just too many of my favourite dishes!

Any way I thought that I would share this simple recipe with you all, because it brings back lots of happy memories for me.
When I was a young girl, my Mum would take me down to the local video shop and we would hire out a video to watch over the weekend. I used to love going down to this shop as the man who worked in there had been on the telly staring in a program called countdown. I used to think that because he had been on the telly, that he was a real famous person that we actually knew! Hahaha! God things were so different then!! His shop was nothing like the dvd shops that you get these days. I was a small shop, but the walls were covered with videos. My mum used to let me pick the ones that I wanted to watch, so it is a real simple but fond memory.
My Mum and my Dad would get a Chinese take-away on the Saturday night. I would already of had lots to eat, but I used to lay there in bed, awake and the fabulous smells from downstairs would travel up to my room. I would sneak onto the upstairs landing and listen to their conversation and listening in on the telly. I When the amazing smells were just too mush for me to handle, I would slowly creep downstairs to my parents in the front room. I'm sure they must of told me to get back up stares but I cant remember that bit. I can just remember going round to both of my parents and pinching food off their plate.

When I was a bit older my Mum would go out to the bingo and my dad would babysit for me. As a treat, he use to either cook for me, or we would get a take away!
Eating egg fried rice to me is like having a big comforting hug on a plate.

When cooking egg, fried rice, there are a few things to remember. It is always best to use old rice that has been in the fridge, at least overnight, so it is a really good recipe to use up your leftover rice.

In this recipe I have just kept it simple for everyday use, but feel completely free to add what ever you like. Sometimes I will add sweetcorn, pea's, onion, prawns, pork, chicken, well in fact, anything.......


Ingredients:- serves 4-5

2 cups of uncooked rice,
2-3 tbs sunflower oil,
3 eggs,
a handful of frozen peas, boiled.
soy sauce 1-3 tbs - to taste
2-3 spring onions for garnishing.

Directions:-

Great if you have left over rice and if you have you use all of the ingredients above, so if you do, you need to adjust the above ingredients.

1) Wash the rice under the tap until the water runs clear. Drain and leave the rice in a warm place for the rice to dry out. this will probably take about 1 hour.

2) In the meantime, you can be preparing all of the other vegetables or meat that you want to use.

3) Once the rice is dry and the rest of the ingredients are prepared. Heat up a wok on a very hot heat.

4) Add some oil and scramble the egg. If you are using cooked meat, you will need to add it now. (Tip. if you are using raw meat, then fry it and keep it to one side until now)

5) Add the peas's and stir fry for a moment.

6) Add the rice and fry on a high heat for 2-3 minutes

7) Sprinkle the soy sauce and mix in well.

Sprinkle the spring onions and serve hot with your favourite stir fry.

ENJOY!! :-) :-) :-)


Thursday, 1 November 2012

South Indian Okra in a Yogurt and Coconut sauce.


This is a realy good dish if you need introducing to okra, becuse of the sauce, it is sweet and sour and rich with coconut. It really is so delicious.

I am not exactly sure of this dishes actual name because a friend has kindly given this recipe. My friend is from kerala and is not to sure on how to write in english.

Last week she invited me over for lunch and she had heard about me blogging about real indian food. She said that she could remember me saying one time in her favourite restaurant, that I would've liked to of recreated the thali that we enjoyed on that particular day. She was going to be cooking this dish anyway for her family so she remembered about me :-) Of cause i was overjoyed to receive the invitation and I gladly accepted.

I decided to walk to her house because it was quite a nice day, one of those days where it is cold and crisp, but a nice bright sun. Once I had arrived at the end of her street I could smell her food! It reminded me of one of those cartoons where the hungry animal gets a whiff of some delicious food and floated it the air to follow the scent :-) As i walked up her garden path the fabulous aroma got stronger and stronger and even more delicious. She must have seen me coming to the door, because she opened the door before I could even knock. She greeted me with open arms and said come in, come in! I walked into her kitchen and it was full of her female relatives. They were all busy doing something, Her Mother was grinding some batter for dosa, her sister was kneading some bread, and there was some of her aunts and cousins there too. It was a kind of organised kaos. She called me over to the cooker and firstly asked if they could get me anything to drink. Her aunt gave me a cup of chai (Indian tea) and my friend and I sat down for a chat.
When we had finished our chai she said to me that we should get on, she handed me a pen and paper and she said that as a gift for being a good friend, she was handing me this recipe that had been through her family for a very long time. I could thank enough, but she just kindly replied " just invite me round for tea" I love her so much! Thanks hun! :-)

Here is my friends beautifully simple, South Indian Okra recipe.

Ingredients:-

2 cups of fresh okra, washed and dried, cut into 1/2 inch flowers
1/2 cup of fresh yogurt (dahi)
1/2 cup freshly grated, frozen or desiccated coconut. If you are using desiccated coconut then you should soak in boiled water for about 1/2 hour, reserving the coconut water.
3 tbs oil,
1 tsp mustard seeds,
10-12 curry leaves,
1/2- 1 tsp kashmiri chilli powder,
1/2 tsp green chilli paste,
water - as required.
salt to taste,
1 1/2- 3 tsp sugar- as per your taste,
fresh green coriander to garnish.


Directions:-

1) Heat some oil in a pan and fry the okra on a low to medium heat until browning at the edges and all of the sliminess has disappeared. Make sure that you don't keep stirring the okra otherwise it will become really slimy and not very nice. Drain on kitchen paper.

2) In a blender, or with a hand blender, mix together the yogurt, red chilli powder, coconut, salt and sugar. Blend until you have a fairly cause paste.

3) Check the seasoning and add sufficient water, but not too much. Test again.

4) Heat a saucepan over a medium to hot heat and add the mustard seeds. Wait until they pop and then add the curry leaves. Let them splutter and then add the okra and sauce.

5) Reheat gently up to boiling point and then serve hot with chapatis and rice, or as part of your favorite thali

Sev Mumra recipe (chickpea vermicelli and puffed rice) Or simply sev, or simply mumra!


Sev mumra is one of those things that you never really think to cook, because I must admit that the shop bought stuff is actually delicious. So for years I have probably spent a small fortune on the stuff.

One of my friends came over for a catch up one day and came with a bag full of homemade sev mumra that she had left over from the weekend. We filled a big bowl full and we sat and nattered and nibbled on this wonderful snack. I said to her that it was the best I had ever tasted by far! She then told me that it was actually home made and one of the easiest things that they prepare in their house. They even prepare this after their main meal is ready, that is if you have some sev already prepared.
It is that easy!! Any way you really must try it, it really is too good to miss!!

Ingredients for the sev:-

1 cup of chickpea flour, (besan)
a pinch of turmeric,
a tsp oil,
1/2 tsp red chilli powder
a tiny pinch of hing,
a pinch of baking soda.
Water as needed.
1/2 tsp of salt


Tip!! You need a sev maker to proceed!

Directions:-

1) Prepare a pan of oil and heat it over a medium heat. There oil should be a few inches deep to cover the sev as it is cooking.

2) Grease the sev maker inside and around the lid and screw. (This just helps with the cleaning)

3) Mix together the above ingredients ensuring that the oil gets well incorporated.

4) Slowly add the water and mix until you have a very sticky batter. It should not be runny, but it definitely doesn't want to be hard, otherwize your sev won't turn out very good.

5) Once you are happy with the batter, check to see if the oil is hot enough by dropping a small drop of batter into the oil and if it sizzles to the top straight the way then the oil is ready. ( also make sure that it is not too hot either otherwise it will taste burnt.)

6) Fill the sev maker with the batter by using a spoon and screw up the lid. Then gently turn the handle over the oil, using circular movements so that the sev almost looks like lace, or if you remember what one looks like a spirograph pattern. :-)(showing my age!) When you have got enough sev in your pan, turn the handle in the other direction to stop the flow of batter.

7) Cook until the oil calms down and then turn the whole thing over to cook the other side.

8) Again cook until the oil calms down and drain onto a piece of kitchen paper.
Repeat the process until you have used up all of your batter.

You can enjoy sev on it's own like this, or use it as a topping for chaats... or you can proceed to make sev mumra!!

ingredients:-

6 cups of puffed rice (Mumra)
7-10 fresh curry leaves,
1/2 - 1 tsp homemade chilli paste,
1/2 tsp homemade garlic paste,
1/2 tsp turmeric powder,
2 tbs oil,
a large pinch of salt.

Directions:-

1) Heat the oven to the lowest temperature that your oven will go to.

2) In a large, clean roasting tin, mix in all of the above ingredients together thoroughly.

3) Pop the tray into the oven and after about 10 minutes, take them out of the oven and give everything another good stir. You must make sure that your sev does not burn.

4) Repeat this process another 2 times. the sev should only need about 25 minutes in total.

5) Once your mumra is ready, it needs to be cooled down to room temperature.

6) This is actually quite nice nike this to, but i like to mix it with some of the above sev. Just mix to your liking! ENJOY!!!

Feel free to leave your tips and feedback, it is always very welcome! :-) :-) :-)

Wednesday, 31 October 2012

Drumstick vegetable, tomato and onion curry.


This is an absolute cracker of a recipe! Drumsticks can be quite a task to find if you do not live near an indian grocery store, but please please buy them if you ever see them because you will not regret it! Not only are they delicious in taste, but texture and health benefits too! Please if you get the chance to google this vegetable please do. This plant could literally save the world! It is an amazing plant. The plant or tree is actually called the moringa tree and most of the plant is edible, when you use the actual stick ( drumstick,) you do not eat the tough outer skin, you scrape out the flesh inside with a spoon or you can suck all the goodness out. I personally prefer to scrape everything out with a spoon and mix in some of the sauce into the mashy goodness. The leaves are very highly nutritious too so again, if you ever get the chance to have these, please do.
What i tend to do if i ever find any is to wash, dry and prepare them and then wrap them up well and pop them into the freezer. The freeze very well.

Anyway here is my version of this delicious dish. Please try and let me know what you think? :-) :-) :-)

Ingredients:-

2-4 young, plump and not damaged in any way drumsticks, washed and cut into 3-6 inch pieces.
1 onion,
3-4 tomatoes,
1/2 tsp black mustard seeds,
1/2 tsp cumin seeds,
2 cloves
a large pinch of hing,
about 10 curry leaves,
1/2 tsp turmeric,
1/2 tsp kashmiri chilli powder,
1-2 green chillies,
3/4 tsp ginger paste,
2 tsp sugar, or to taste.
salt to taste,
fresh green coriander to garnish.

Directions:-

1) Boil the drumsticks in slightly salted water for around ten minutes, or until the drumsticks are starting to open. Drain and set aside.

2) Dice the onion and wash and chop the tomato.

3) Heat 2 tbs oil in a pan and once the oil is hot enough, fry the mustard seeds until they pop like popcorn :-)then add the cumin seeds, cloves, hing and curry leaves and let them splutter for a moment before adding the diced onion and some salt.

4) Cook the onions until they are starting to brown at the edges and then add the chopped tomatoes. Cook these down until they are all nice and mushy - like a thick sauce.

5) Then add the turmeric and chilli powder with the sugar and give it a good mix.

6) Add about 1 1/2 cups of boiling water, cover and simmer on a low heat for about 10 minutes.

7) Add the drumsticks and simmer on a low heat for another 10 minutes. Be sure to check the water levels because this dish needs to be quite soupy.

8) Check the seasoning and adjust to your taste. Garnish with coriander and serve with gujarati potatoes, gujarati kadhi, with rice and chapatis.

ENJOY!!!! :-)