Showing posts with label rice. Show all posts

Wednesday, 29 April 2015

Thai Nam prig pow and vegetable fried rice recipe


I actually can't believe that this is my first Thai recipe on this blog, when it is one my all time favourite cuisines! My husband and I have been to Thailand many times and we have completely fallen in love with the country, cuisine, culture and most of all, the people!

I actually think that this is a very suitable dish to have as my first Thai recipe on blog, simply because It was one of the first dishes that I had on my very first visit to the land of the golden smiles.

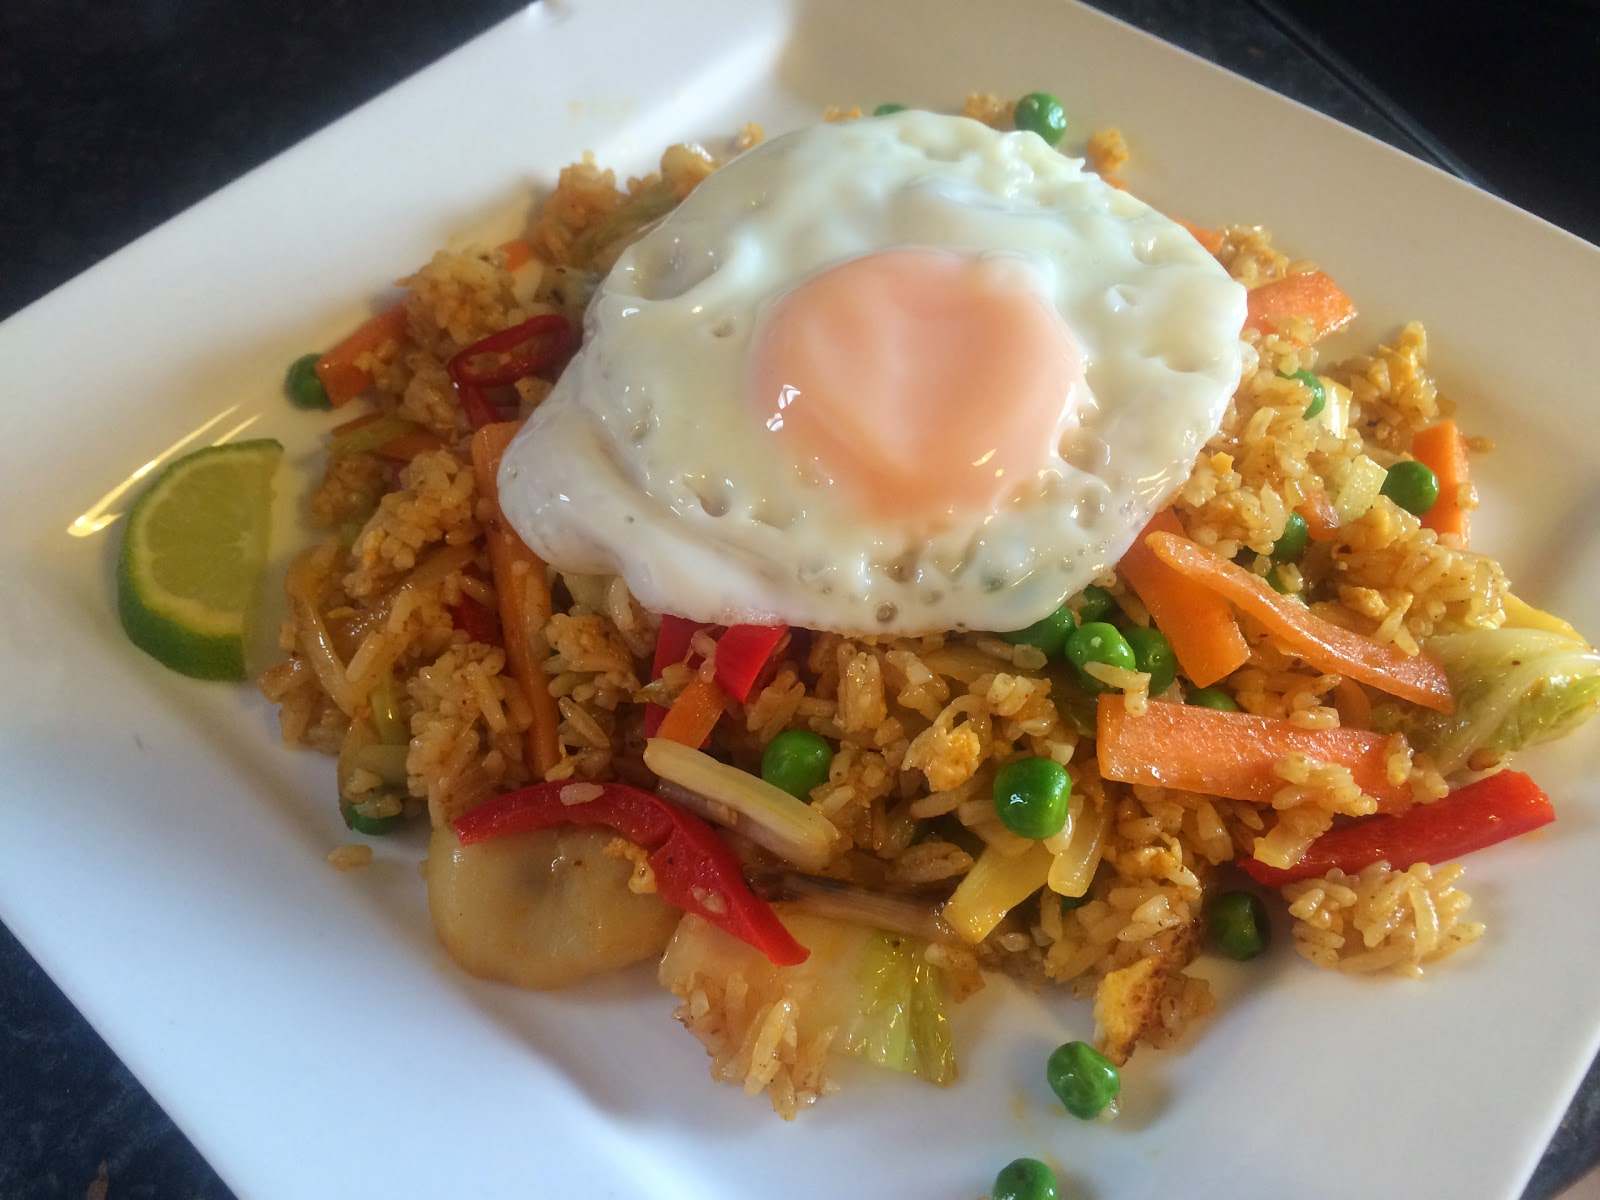
What I love about this dish is that this recipe calls for left over rice. So what I always do, is cook double the amount of rice the day before. It then makes for a really good lunch time, or evening meal.
You don't even have to add the veggies if you don't want to, or you have little time to spare.

One thing I would recommend you try although it is definitely not essential, is to make your own nam prig pow paste. The one that you buy from the shop is truly delicious, it is just good to be able to make it according to your own tastes and also you know that there isn't any rubbish going into it. It isn't hard to do, just make sure to do it in advance. I will post my recipe next. Oh I'm sorry, im forgetting to say what nam prig pow is!!!! It is a massively amazing versatile Thai  paste, containing caramelised shallots, garlic, chillies and other ingredients. I don't live very close to an Asian supermarket, so I like to make my own. It will last for about 3 months in an airtight container in the fridge.
Here is the link for the paste recipe below. 😄


Here is the recipe for nam prig pow fried rice!

2-3 cups of left over rice. Jasmine or basmati is preferable.
1/2 a large white onion,
3 spring onions,
1 carrot
3 or 4 large leaves of Napa cabbage or Chinese leaf
1/2 cup cooked green peas
1/2 large red pepper,
1 large red chilli
3 cloves garlic
Bamboo shoots and water chestnuts just to taste
1 tbs fish sauce,
3 tsp nam prig pow chilli paste.
Lime wedge for seasoning to taste
2-3 eggs. One for frying and popping on the top.

Directions
Prepare everything befor cooking.

1. Julienne the all of the washed vegetables to a uniform size. Just roughly chop the garlic.


2. Heat a tbs of oil into a wok and wait until it reaches smoking point.
3. Add the onions and fry for about a minute before adding the chilli and the garlic.


4. Add the carrots and fry for about a minute, then quickly add the peppers, spring onions, bamboo shoots and water chestnuts.add the Chinese leaf at the end and only stir fry for a minute or so.Stir fry until done. Set aside.


5.to the same wok as you were just using, add another 1/2 tbs oil and wait until it reaches smoking point.
6. Add the left over rice and stir fry for a minute or so, but make sure that you break up all of the lumps.
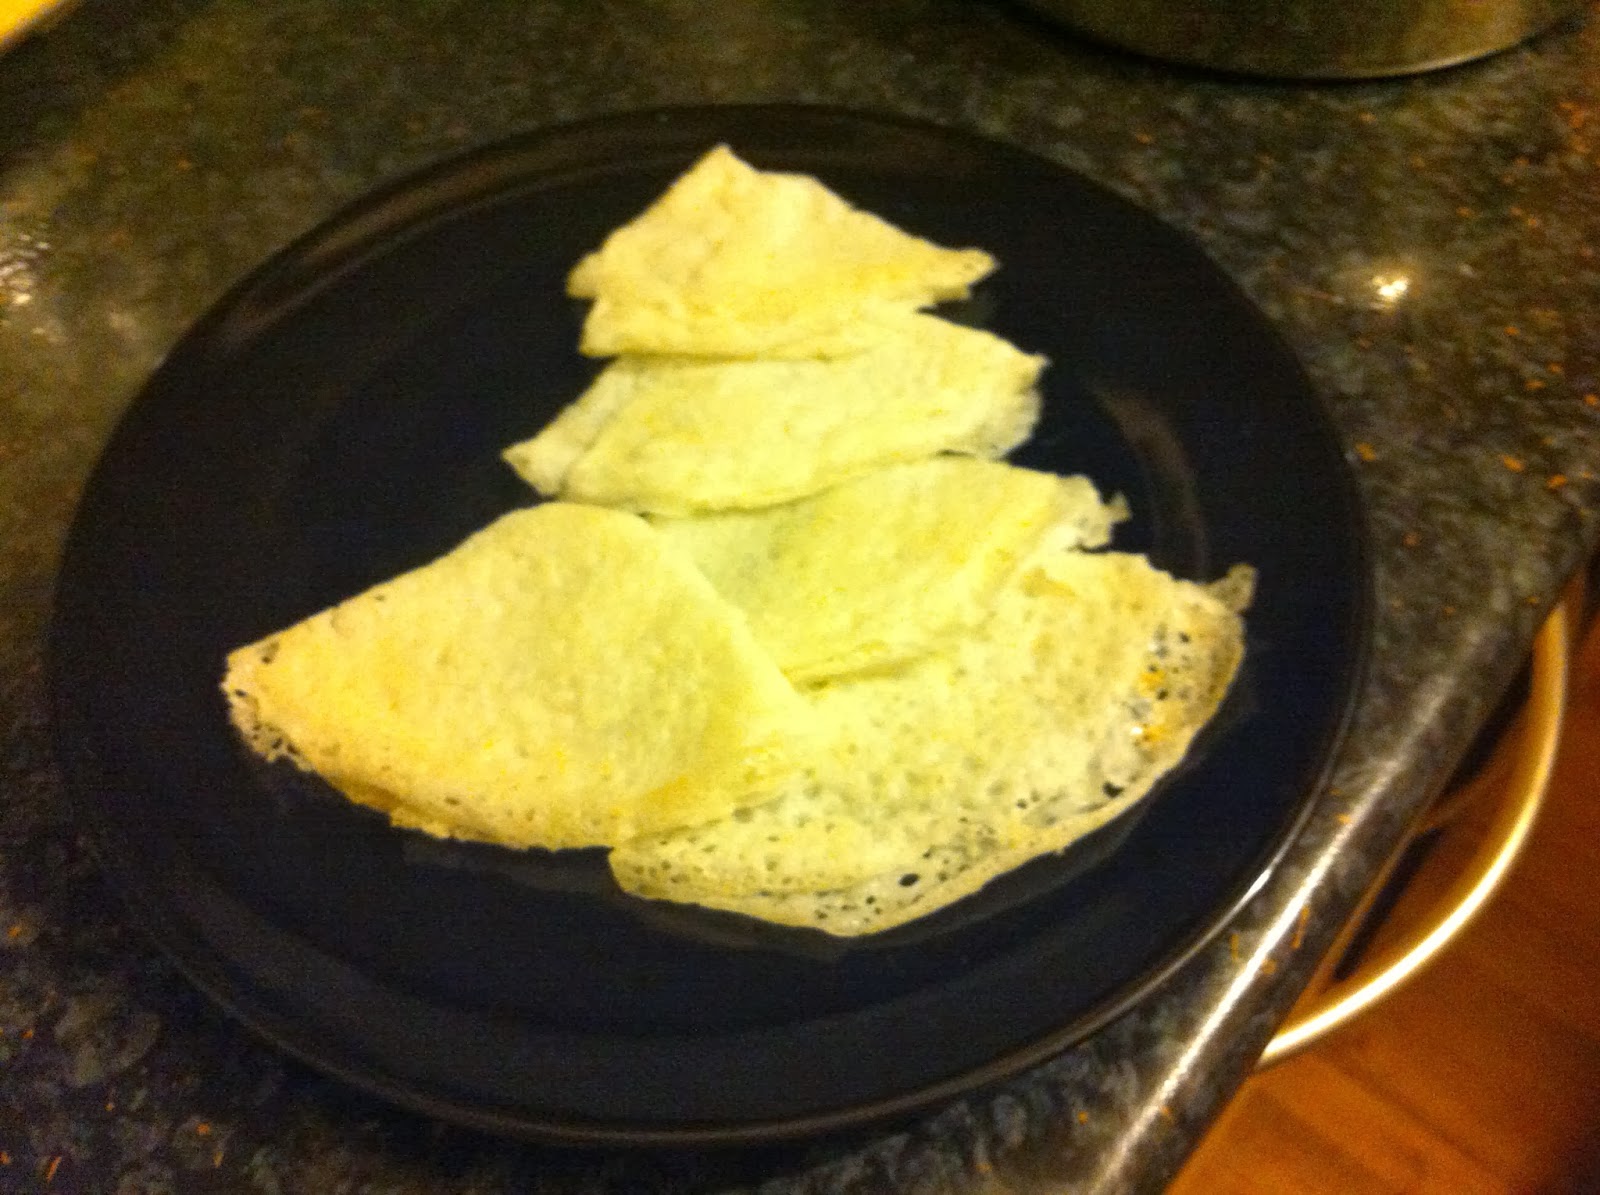
7. Push the rice to one side and break an egg into the pan. Scramble the egg until it is in fairly small pieces.


8. Mix the rice and the egg together and then add the fish sauce and the nam prig pow. Mix everything together really well.

9. Add the vegetables and stir fry everything together for a few minutes. Taste for balance of flavours


10. Heat up another frying pan for the egg. Quickly fry the egg, ensuring that you leave the yolk runny.
 11. Serve the hot rice into bowls or plates and serve the fried egg on top with the wedge of lime.

ENJOY!!!!!


Tuesday, 31 December 2013

neer dosa


YUM YUM YUM YUM YUM!!! One of my fantastic customers had in invited me over for tea one day, after a day in the salon. Masala dosa has always been an all time winner for me, but I just couldn't emagine what she was she was trying to explain to me during that day. She explained that these dosa are REALLY something special! They are soft and lacy, with a delicate flavour, made from rice and a hint of coconut. "I will cook them for you later". Because I have turned down a few offers before I thought to myself that I must try this time. I suppose that I have turned down offers to learn how to cook authentic food before out of shyness and not wanting to put people out, but she insisted and I knew that it would make her happy. Well once I had tried these little folded pieces of joy, I was just hooked instantly!

We had a lovely chat and a catch up while we were waiting for the rice to soak. She dressed me up in her sarees and jewellery and I have never felt like such a princess before! This has been a regular treat for me when I go to visit her, but I wont bore you with that story now lol :-)

the picture above shows the true colour of the dosa. The picture below is a good close up of the lacy texture, but they look yellow because I took that picture in my kitchen late at night and the light wasn't very good :-S
Ingredients:-

1 cup of sona masuri rice, but any medium grain will do. I have even used basmati and it works fine.
1/4 cup of grated coconut,
in total, approximately 1 1/4 cups of water. more or less may be needed.
3/4 tsp salt or to taste.

Directions:-

1) Wash and soak the rice in enough cold water. My friend on the day soaked the rice for an hour in warm water, but for best results soak in cool water for at least 4 hours, or even over night.

2) Drain the rice and grind with the coconut and some fresh water in a blender until very, very smooth..you will just need to add a little water at a time and also remember to give you blender a rest in between grinding, otherwise it might over heat and go into meltdown! :) To test if you have the batter thin enough and fine enough, check on the back of a spoon. if the batter clings to the spoon, it is too thick. If you batter has grit in it, it hasn't been ground enough. Add the salt. The Picture below shows how the batter doesn't cling to the spoon at all. That is why the dosa is called "neer dosa" It translates into "water dosa"


3) To cook the dosa, you will need a relatively  new non-stick pan, with a tight fitting lid. heat the pan over a medium to low heat. splash a few drops of water, just to check if the pan is hot enough. If it sizzles and evaporates straight the way, then the pan is ready.

4) Pour a few drops of oil onto the pan and grease the pan with some kitchen paper and drop some of the batter onto the frying pan, but you need to kind of tilt the pan to spread a thin even layer.

5) With the back of a teaspoon, drop a few drops of oil in and around the dosa, paying particular attention to the edges. Put the lid on the pan and cook for 1-3 minutes. You don't want the dosa to be burned, but you need the dosa to be cooked.

6) Once the dosa is cooked, using a spatula, loosen the edges and fold into quarters.

Serve this melt in you mouth dish as an an accompaniment to curry with a sauce like sambhar, or enjoy plain with chutney or pickle. In the top picture, I have had it with chole. Enjoy and let me know what you think?    :-)


Saturday, 2 February 2013

Simple egg fried rice recipe


I thought that I would share a few different recipes that I cook at home on regular basis. Even though Indian food is my first love, I am just simply head over heels for all Asian cuisine. I suppose if I was to have some sort of order, of cause my favourite would be Indian, then Chinese (e.g dim sum,) then a very close third would be Thai food, then again very close would be Japanese food. If I have ever been to a restaurant and really enjoyed the food (practically every time :-) I love to try and re-create the food that I have enjoyed. I suppose it is almost like a quest to cook all of my favourite food. I'm sure that I will never complete my quest because there are just too many of my favourite dishes!

Any way I thought that I would share this simple recipe with you all, because it brings back lots of happy memories for me.
When I was a young girl, my Mum would take me down to the local video shop and we would hire out a video to watch over the weekend. I used to love going down to this shop as the man who worked in there had been on the telly staring in a program called countdown. I used to think that because he had been on the telly, that he was a real famous person that we actually knew! Hahaha! God things were so different then!! His shop was nothing like the dvd shops that you get these days. I was a small shop, but the walls were covered with videos. My mum used to let me pick the ones that I wanted to watch, so it is a real simple but fond memory.
My Mum and my Dad would get a Chinese take-away on the Saturday night. I would already of had lots to eat, but I used to lay there in bed, awake and the fabulous smells from downstairs would travel up to my room. I would sneak onto the upstairs landing and listen to their conversation and listening in on the telly. I When the amazing smells were just too mush for me to handle, I would slowly creep downstairs to my parents in the front room. I'm sure they must of told me to get back up stares but I cant remember that bit. I can just remember going round to both of my parents and pinching food off their plate.

When I was a bit older my Mum would go out to the bingo and my dad would babysit for me. As a treat, he use to either cook for me, or we would get a take away!
Eating egg fried rice to me is like having a big comforting hug on a plate.

When cooking egg, fried rice, there are a few things to remember. It is always best to use old rice that has been in the fridge, at least overnight, so it is a really good recipe to use up your leftover rice.

In this recipe I have just kept it simple for everyday use, but feel completely free to add what ever you like. Sometimes I will add sweetcorn, pea's, onion, prawns, pork, chicken, well in fact, anything.......


Ingredients:- serves 4-5

2 cups of uncooked rice,
2-3 tbs sunflower oil,
3 eggs,
a handful of frozen peas, boiled.
soy sauce 1-3 tbs - to taste
2-3 spring onions for garnishing.

Directions:-

Great if you have left over rice and if you have you use all of the ingredients above, so if you do, you need to adjust the above ingredients.

1) Wash the rice under the tap until the water runs clear. Drain and leave the rice in a warm place for the rice to dry out. this will probably take about 1 hour.

2) In the meantime, you can be preparing all of the other vegetables or meat that you want to use.

3) Once the rice is dry and the rest of the ingredients are prepared. Heat up a wok on a very hot heat.

4) Add some oil and scramble the egg. If you are using cooked meat, you will need to add it now. (Tip. if you are using raw meat, then fry it and keep it to one side until now)

5) Add the peas's and stir fry for a moment.

6) Add the rice and fry on a high heat for 2-3 minutes

7) Sprinkle the soy sauce and mix in well.

Sprinkle the spring onions and serve hot with your favourite stir fry.

ENJOY!! :-) :-) :-)


Thursday, 1 November 2012

Sev Mumra recipe (chickpea vermicelli and puffed rice) Or simply sev, or simply mumra!


Sev mumra is one of those things that you never really think to cook, because I must admit that the shop bought stuff is actually delicious. So for years I have probably spent a small fortune on the stuff.

One of my friends came over for a catch up one day and came with a bag full of homemade sev mumra that she had left over from the weekend. We filled a big bowl full and we sat and nattered and nibbled on this wonderful snack. I said to her that it was the best I had ever tasted by far! She then told me that it was actually home made and one of the easiest things that they prepare in their house. They even prepare this after their main meal is ready, that is if you have some sev already prepared.
It is that easy!! Any way you really must try it, it really is too good to miss!!

Ingredients for the sev:-

1 cup of chickpea flour, (besan)
a pinch of turmeric,
a tsp oil,
1/2 tsp red chilli powder
a tiny pinch of hing,
a pinch of baking soda.
Water as needed.
1/2 tsp of salt


Tip!! You need a sev maker to proceed!

Directions:-

1) Prepare a pan of oil and heat it over a medium heat. There oil should be a few inches deep to cover the sev as it is cooking.

2) Grease the sev maker inside and around the lid and screw. (This just helps with the cleaning)

3) Mix together the above ingredients ensuring that the oil gets well incorporated.

4) Slowly add the water and mix until you have a very sticky batter. It should not be runny, but it definitely doesn't want to be hard, otherwize your sev won't turn out very good.

5) Once you are happy with the batter, check to see if the oil is hot enough by dropping a small drop of batter into the oil and if it sizzles to the top straight the way then the oil is ready. ( also make sure that it is not too hot either otherwise it will taste burnt.)

6) Fill the sev maker with the batter by using a spoon and screw up the lid. Then gently turn the handle over the oil, using circular movements so that the sev almost looks like lace, or if you remember what one looks like a spirograph pattern. :-)(showing my age!) When you have got enough sev in your pan, turn the handle in the other direction to stop the flow of batter.

7) Cook until the oil calms down and then turn the whole thing over to cook the other side.

8) Again cook until the oil calms down and drain onto a piece of kitchen paper.
Repeat the process until you have used up all of your batter.

You can enjoy sev on it's own like this, or use it as a topping for chaats... or you can proceed to make sev mumra!!

ingredients:-

6 cups of puffed rice (Mumra)
7-10 fresh curry leaves,
1/2 - 1 tsp homemade chilli paste,
1/2 tsp homemade garlic paste,
1/2 tsp turmeric powder,
2 tbs oil,
a large pinch of salt.

Directions:-

1) Heat the oven to the lowest temperature that your oven will go to.

2) In a large, clean roasting tin, mix in all of the above ingredients together thoroughly.

3) Pop the tray into the oven and after about 10 minutes, take them out of the oven and give everything another good stir. You must make sure that your sev does not burn.

4) Repeat this process another 2 times. the sev should only need about 25 minutes in total.

5) Once your mumra is ready, it needs to be cooled down to room temperature.

6) This is actually quite nice nike this to, but i like to mix it with some of the above sev. Just mix to your liking! ENJOY!!!

Feel free to leave your tips and feedback, it is always very welcome! :-) :-) :-)

Sunday, 15 July 2012

Easy Idli! (rice dumpling for sambar)


IDLI!! I have always loved the soft little clouds of fluffy delight. There is just something so satisfying about these seemingly simple dumplings from heaven!
For a long time I had only eaten these at restaurants and never really tried to cook them at home because the whole preparation thing, until I bought a bag of ready prepared idli flour! Not the ready mixed that you get in a box! I have tried these before and they really don't cut the mark so this is why I tried the bag of the properly milled mix. When I did it, it was so so easy and the out come was the best yet! The only downside really was the price. I don't want to sound like I'm being stingy, it just that I hate paying the high price of things that are ready prepared, when I can just put a tiny bit of prep, good results and half of the price! So, I thought that I would try to grind my own idli mix. The only downside to me doing this is, I only have a small grinder and i can't mix up anything wet into it. I have a food processor but it just doesn't seem to grind fine and evenly enough. I just use my processor for the convenience of chopping and grating food stuffs, although it is quite good for making coriander chutney! :-) But anyway! I thought that I could grind my own flour mix. So after much trial and error, I bring to you, my easy idli recipe!
P.S I will improve the photo soon because the idli's look yellow and they really are white! :-)

Ingredients:-

1 measuring cup of coarse rice flour,
1 tbs white urad dal,
1/8-1/4 fenugreek seeds,
1 tsp salt - or to taste,
1 tsp eno. (not to be mixed until the last minute.)

Directions:-

1) Grind the urad dal and the fenugreek seeds to a coarse flour. Sieve the flour to separate the ungrounded grains. Blend again if you need to.

2) Mix the ground mixture and the salt with the coarse rice flour and mix together well.

3) Mix enough hot water from the kettle to make a fairly thick batter. It should be about dropping consistency, but not quite poring consistency. You can always add some more hot water if the batter thickens. The amount of water was the thing that I have struggled with the most. I know that I haven't written a measure for the water, but I find that the measurement is different every time. I have also found that if you don't add enough water the batter will not ferment properly, but if you add too much water, the idli's will become a messy mush when cooked.

4) Leave to ferment over night in a warm place. Because I live in England, I leave my mixture in the airing cupboard over night or for about 11 hours.

5) when you start to see bubbles in the batter it is ready to cook.

6) Grease your idli moulds and set a large pan of water to boil. If you don't have an idli mould you can always use an egg poacher.

7) If you are using an egg poacher you will have to add the eno in batches. If you are using an idli mould add all of the eno and mix in quickly and then ladle the mixture in to the moulds.

8) Steam for about 8-10 minutes. You can check if the idli's are cooked through by sticking a knife into the thickest part. If the knife comes out clean with no creamy bits on it the idli's are cooked.

Enjoy with sambhar or tomato rasam.


Sunday, 13 May 2012

Perfectly cooked Basmati rice


I'm sorry about the dodgy photo lol!!! I will change it soon, it was taken late at night! Anyway I thought I would post about plain and simple basmati rice, because surprisingly such a simple thing could be such a problem to cook for beginners. It took me so many attempts get to nice fluffy rice instead of either little pellets or sludge.

Once you know how to cook this delicious staple, you will be cooking it all of the time, as a side dish for everything.

Serve it plain, or spice it up for a special occasion. I will post some spicy rice dishes soon. SO WATCH THIS SPACE!!

Ingredients:-

Equal amounts of basmati rice and water,
A pinch of salt.

Directions:

1) Wash the rice, in a colander really really well under cold running water until the water runs clear.

2) This step is not essential, but I think that you will end up with a better end result, is to now leave the rice in a colander on the draining board to dry out. It doesn't take as long as you think to dry and you can be getting on with the rest of the dinner while it dries.

3) When the rice is dry and the grains are not stuck together, put in to a small saucepan with the same quantity of water and bring to the boil adding a pinch of salt.

4) The moment it reaches boiling point, turn the heat down to the lowest setting.
Cook with a tight fitting lid until all of the water has evaporated.

Remember to taste the rice to see if it is cooked properly.
And serve with anything!!! :-)

Please leave your comments, as they are much appreciated. :-) :-) :-)

Friday, 2 March 2012

Khichi recipe ( My way )

I know that i have said this every time so far on all of my posts, but i really do find this recipe truly irresistible!
I actually feel quite proud of my self really because i have truly improvised on this recipe! I have khichi many times when i go shopping to Belgrave road. Of course this is one of my favourite dishes because it has that smooth silky texture that i go crazy about, but i just could not find a recipe that came close! So after years of searching for a recipe that gave even similar results to the khichi which i adore!
Like i have said i have completely improvised on this recipe, so if you know of the recipe and are recoiling in horror over my preparations, then i really do apologise for this. But i really am quite proud for what i have concocted. Please give your opinion to help.

So here goes ......

Ingredients:-

1 heaped cup of fine rice flour ( sieved )
about 2 cups of water
1 big fat chilli with the seeds
1/2 sprig of fresh coriander ( optional )
1 tsp salt or to taste
1/8 tsp ajwain seeds
3/4 tsp cumin seeds
1/8-1/4 tsp asafotida ( hing )
1/4 tsp turmeric
a tiny pinch of papad khar or baking powder
3 tbs oil

Directions:-

1) Finely chop the chilli add the coriander and grind to a fine paste with the salt in a pestle and mortar. ( This makes a nice puree instead of blending in a blender.)
2) Heat the oil in a pan and add the seeds and fry until they splutter.
3) Add the green paste take off the heat and stir for 30 seconds
4) Add the turmeric and mix well. Put back onto the heat and turn up the heat.
5) Add the water and the papad khar. Bring to the boil.
6) When the water is boiling, add the rice flour and stir with a wooden spoon or a large spoon ensuring there is no lumps. ( you might want to take it off the heat to do this, just so that the bottom of the pan does not catch on the heat.
7) Before putting the lid on i would just give it a little taste, just to check the seasoning.
8) put on the lid and cook on a low flame for 10-15min. Then give it another vigorous stir.
9) After another 10-15 give it anther good stir.
10) In total you should need to cook this for anything between 1/2 hour - 1 hour, stirring every 10-15 minutes. I quite like the Constancy after about 3/4 hour.
11) When it is at the consistency that you like transfer into a bowl to cool.
12) When the khichi is cool enough to handle, well oil your hands and mold the khichi into small ball that are all the same size.
13) If you like, flatten and shape them in your hand, and with you thumb or kitchen utensil, form a hole in the center of the khichi.
14) Garnish with coriander, red chilli powder and oil ( optional )

Tips:-
If you don't have time you can just neatly pack it into a container and cool and refrigerate. When it comes to serving you can just slice the khichi.